Facebook uses automatic alternative (alt) text to provide a visual description of any image posted. While this is helpful and convenient, you should still consider replacing this text to provide a better description of the image. It allows you to describe the image from a human-centered perspective thus making it more relatable to readers.
Below is a step by step guide to adding alt text to your Facebook photos.
To see and edit alt text for a photo before you post it:
1. Click “Photo/Video” at the top of your News Feed. Select the photo you want to add then click “Open” to proceed.


2. Hover over the photo and click Edit then go to Alternative Text.

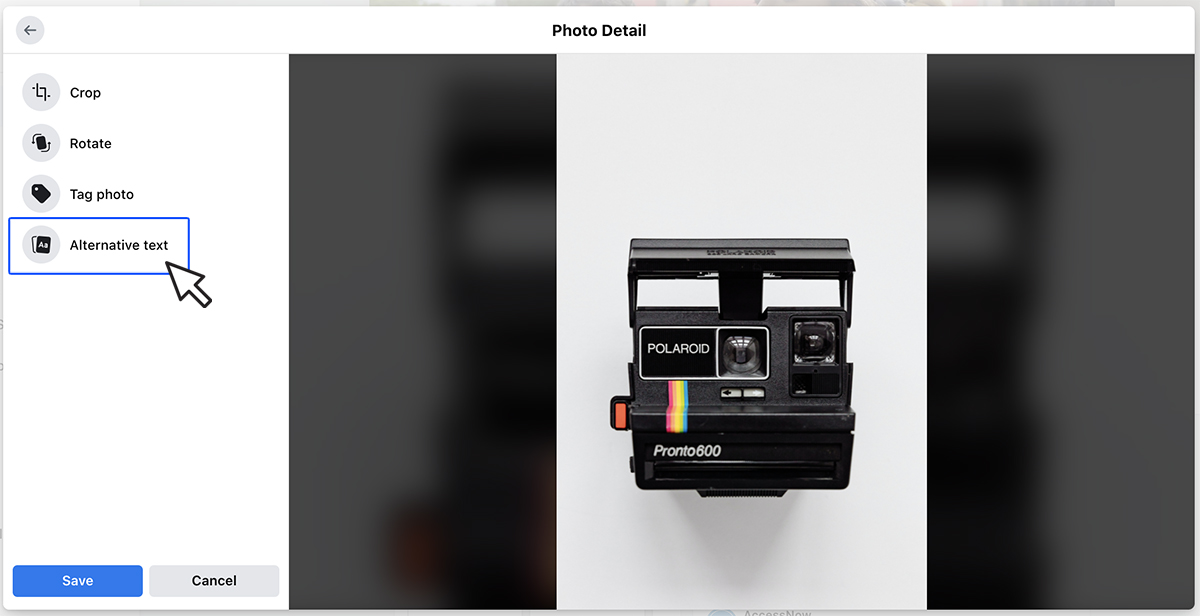
3. The automatically generated text will be shown on the left side of your photo. Click custom alt text to override and edit.

4. Write your alt text in the box. (To change back to the automatically generated text, click Clear.) To save your alt text, click Save in the bottom left.

To change the alt text of a photo after you’ve posted it:
1. Click the photo to open it. Click the 3 dots in the top right for the Photo Settings. Select “Change Alt Text”.


2. Change the alt text in the text box. You can also click Clear to change your edited alt text back to the automatically generated text. Click Save.

Want to add alt text to your Instagram photos too? We’ve got a guide for that.
If you need any help with writing alt text or image descriptions, please don’t hesitate to email us.